The Best Brownies Ever

So, I know I’ve been offline for a while but to make it up to you I’m going to post the BEST BROWNIE RECIPE EVER to win your forgiveness.

FullSizeRender

Now, before I get to the brownies a few updates:

1) I’m still training for my half marathon goal. I’ll have to do a separate post soon with my stats, but trust me when I say things are going well. I’m improving on times and stamina. I do think I need to up my strength training, but otherwise, I’m a happy runner.

2) I bought new running shoes:

Adidas Running Shoes in Pink

Adidas Boost Supernova Sequence 7–I love them.

3) I’ve been cooking up a storm in my new dutch oven! Here’s a chicken I roasted just the other Sunday:

FullSizeRender-3

So, now onto the brownies, but first a little backstory. Here in Korea sweet potatoes are to fall like pumpkin spice is to lattes. It’s not uncommon to see students snacking on baked sweet potatoes or to have a baked sweet potato for breakfast. I have come to love sweet potatoes in a profound and deep way and wanted to figure out other ways to use them. Enter Interwebs. After some research and a few cups of coffee, I found a recipe that required minimal ingredients which included sweet potatoes and chocolate. Zing!

Without further adieu, I give you the best brownie recipe ever based off of this one here but with a few tiny changes.

Things you will need:

Wet Stuff

Sweet potatoes, between 2-2 1/2 cups (baked, peeled and mashed)

2 eggs

2 tsp of Jim Beam (BOOM!)

1/2 cup honey

1/2 cup of virgin olive oil

Dry Stuff

1 tbsp baking powder

1/2 tbsp baking soda

1 cup of unsweetened cocoa powder

2 tbsp coconut flour

What I Did

1. Preheat the oven to 365F.

2. In a bowl, mix dry ingredients together.

3. In another, larger bowl mix together the wet ingredients making sure that they are well incorporated and as lump free as possible.

4. Slowly add in dry ingredients into the wet ingredients bowl until you have a smooth batter. Now, here’s something to keep in mind when working with coconut flour. This is the sponges of flour. It absorbs liquid more quickly than I absorb hot toddies at Christmas. Keep your olive oil or your Jim Bean close at hand. You might need to add a bit more of either (or both–whatever tickles your fancy) so that the batter doesn’t get too dry.

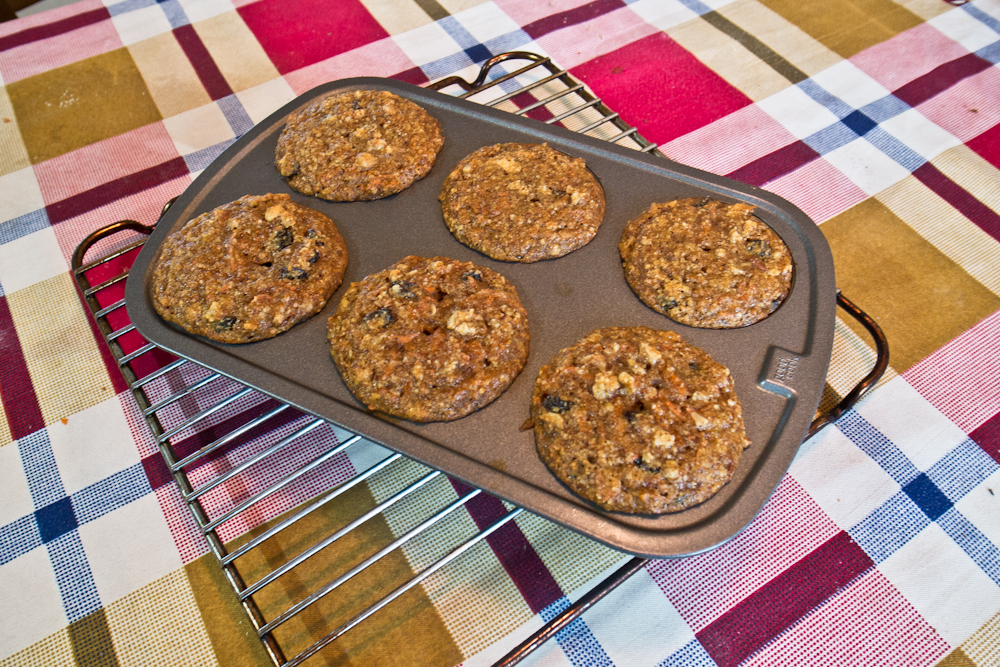
5. Once your batter is at your desired consistency, pour it into a baking pan that’s either greased or lined with parchment paper.  A word of advice: make sure that you use a pan that isn’t too big. You want the brownie batter to be at least an inch thick in the pan to have thick, moist delicious brownies. Trust me.

6. Bake in the oven for at least 30 minutes. Check to see if the brownies are done via the tried and true toothpick test. Leave in for a little more time as needed until the toothpick comes out clean. I ended up baking mine for probably about 40 minutes but my oven is like that.

7. Let the brownies cool for as long as you can resist eating them.

8. Enjoy!

FullSizeRender-2

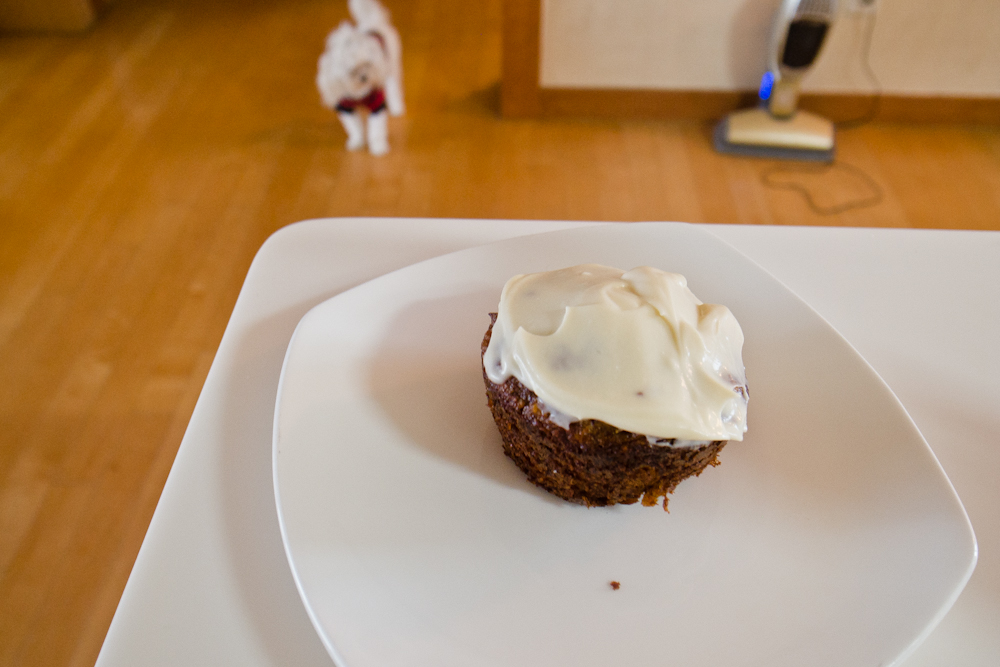
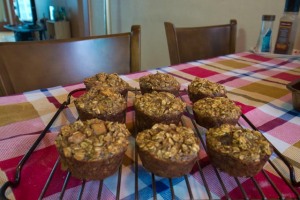
These brownies were a huge success in our house. Between my husband and I, I don’t see them lasting more than 48 hours, if that.  They were moist, rich and chocolatey and honestly some of the best brownies I’ve ever had the pleasure of eating.  I think next time I make them I’ll add some walnuts and maybe try and make some frosting, though they are so moist that they really don’t need it.

Anyhow, I hope you enjoy the recipe!

Happy baking and running!

xoxoxo

Chicken Pie, Or What Happiness Tastes Like

R0011234

Hello and yes, it has been donkey’s years since I last posted. Without getting too much into it, a lot has been going on, not all of it pleasant. But, such is life and such is the reason do bury one’s sorrows in a steaming, heaping plate of chicken pot pie full of butter, gluten, carbs and happiness. When life throws you lemons, slice those up and put them in your cocktail, which you can sip on while you make your chicken pot pie.

So, for this dish I’ll be giving you two recipes: one for the dough and one for the insides. I don’t claim to be the original author/creator of either of these, but I’ve been using them for so long now I don’t even remember where they came from. And, as is usually the case with all us bakers, concocters, culinary adventurists, over time we add this and that and the recipe becomes a little bit our own which is a lovely thought indeed.

All right, enough exposition. Let’s get to the good stuff. First up, the dough.

This recipe is for your average Cream Cheese Crust dough which is great for pies, both savory and sweet, and I’m sure for many other things as well that I’ve not yet discovered or tried. These measurements yield two full crusts, and by full I mean you’ll have a top and bottom to the pie crust. For this crust you will need:

▪   226 grams of softened butter

▪   226 grams of softened cream cheese

▪   2 cups flour

I use grams since I’m here in Korea and nothing is in ounces. But, basically I think converts to 8 ounces of cream cheese and two sticks of butter. The name of the game here is equal parts. Follow that rule and you should be fine.

So, I let my dairies set out for a good long while until both are nice and soft and easy to work with. I then cream them together in a bowl until they are fully integrated. Then, I slowly add my flour until I have dough, like so:

R0011221

Then, I divide the dough into two balls, wrap them in wax paper, put them into two Ziplock bags and freeze or refrigerate depending on when I need/want to use the dough.

R0011225

I would recommend refrigerating for about an hour at least before you plan on using it otherwise it will be a gooey, unruly mess and you will end up covered in flour and tears.

Now, on to the Chicken Filling for the Chicken Pot Pie. You will need:

▪   1/3 cup butter

▪   a small-med onion, chopped (depending on how jazzed you are about onions. In fact, this applies to all the ingredients below)

▪   a small carrot, chopped

▪   a medium potato, cut into small cubes

▪   1/3 cup chopped mushrooms

▪   1/3 cup peas

▪   2 chicken breasts, cubed

▪   1/2 cup milk

▪   1 cup chicken broth

▪   1 tbsp thyme

▪   salt and pepper to your liking

Take out one ball of dough from the fridge and set aside. It will need this time to warm up so it will be easier to work with. Then, heat your oven to 200-205C so that it is nice and hot for zee bakingks. In a saucepan, melt the butter making sure not to brown or burn. Add in the onions and cook for 2-3 minutes or so or until they begin to soften and become translucent. Add chicken and cook until meat turns white. Add in the rest of your vegetables and spices and cook for about 5 minutes.  The veggies should start to release some fluid, particularly those mushrooms! Then, stir in your flour making sure all of mixture is covered in flour and well blended. Then, gradually stir in your liquids. Start with the milk and then add enough broth until your sauce is nice and thick but not too runny. Stir continuously. I would let cook for another 2-3 minutes or until the sauce is thick and bubbly. Turn off the heat.

Dust your workspace with some flour. Take your dough and cut it in half. You should have two fairly equal half-balls of dough. Using a rolling pin, roll out one half of the dough being sure to continually dust it so that it doesn’t stick to your counter or rolling pin! When you have it to the necessary size, carefully lift it up and place it into your buttered pie pan. Now, pour your mixture into the pie pan with the crust. Roll out the remaining half of dough for the top of your pie crust. Place on top of the mixture and seal the edges and cut in some decorative vents, like so:

R0011229

(Aside: remember, it doesn’t have to be pretty. Mine certainly isn’t, but Martha Stewart isn’t coming over to eat this. Chances are it will be eaten in front of the TV while watching Despicable Me 2. And, it makes my tummy joyful which is good enough for me!)

Then, place in the oven and bake for about 45 minutes or until the crust is golden brown. Take the pie out of the oven when ready and let stand for five minutes before serving.

A few notes here: I find that its best to place the pie on a baking sheet or pan lined with some tin foil to avoid a smoky, horrible mess in your oven. The gravy gets bubbly and sneaks out of the pie and drips onto your oven and well, you get the idea. Also, as with all my recipes, these measurements are all ball parks. I’m an eye-baller and to-taste kind of kitchen person. So, if these measurements don’t work for you, adjust and change what you like for your best and happiest result.

Pair this with a salad and a bottle of wine and despair-be-gone!

R0011243

I hope this recipe helps you keep the blues at bay.

Though I may be silent, I’m always cooking. More posts, as always, to come.

Love and flour,

Gabi

Baking Win: Parts Two and Three

Hello baking friends and how time flies. Seems like it was just yesterday that I was posting about almond flour and now its two weeks later, the temperature has dropped and the skies are the color of cement. But, not to worry. Fall is the season for baking, after all, and though all may be a bleaker shade of grey outside, indoors it’s warm and smelling of cinnamon and nostalgia.

Anyhow, I’m back today to finish posting about my first experiment with almond flour in what turned out to be a fairly significant win for me as a baking hobbyist.

So, once my almond flour was made I set out to bake carrot cake cupcakes using a recipe from the always wonderful Elana’s Pantry. But, of course, I’m never one to follow a recipe without adding a few things of my own. So, here’s what I used:

  • 1 1/2 cups almond flour
  • 1/2 tsp sea salt
  • 1/2 tsp baking soda
  • 1/2 tsp cinnamon
  • 1/2 tsp nutmeg
  • 1/4 tsp ginger
  • 3 eggs
  • 2 tbsp grapeseed oil
  • 1/4 cup honey
  • 1 1/2 cups grated carrots
  • 1/2 cup chopped walnuts
  • 1/2 cup raisins

R0011189

1. In a large bowl, combine almond flour, salt, baking soda and spices.

2. In a separate bowl, mix together eggs, honey and oil.

3. Stir wet ingredients into dry.

R0011190

4. Mix in carrots, walnuts and raisins.

5. Scoop a heaping 1/4 cup batter into a buttered muffin tin.

R0011191

6. Bake at 325F/ 170C for 22-25 minutes.

7. Pierce cupcakes with a toothpick to check if they are done. If the toothpick comes out clean then they are done!

8. Cool to room temp.

R0011193

While cupcakes are cooling it’s time to make the frosting! Carrot cake isn’t complete without some cream cheese frosting. Here’s a recipe I experimented with that was a total success:

  • 8 tbsp cream cheese at room temp (nice and soft!)
  • 3 tbsp plain yogurt
  • 3 tbsp honey
  • 1 tsp (ish) vanilla extract

Mix the ingredients together until you have creamy, smooth frosting. When cupcakes are cool, frost and serve!

R0011205

All in all, this made for about 10 cupcakes which did not last the night! My fiancé, who is a fan of Starbuck’s carrot cake, told me that these cupcakes were better  (he sure knows how to say the right thing!) and our dinner guest told me she would buy these at a shop!

R0011194

Anyhow, I felt like a baking hero after whipping up these treats and I will certainly be making them again. They’re a great dessert alternative that doesn’t sacrifice taste for healthiness. Give them a try and let me know what you think!

Love and cupcakes,

G


Baking Win: A Story in Three Parts

Today was a baking win on so many levels, I don’t even know where to start. So, I suppose I’ll just start at the beginning.

My morning agenda included accomplishing three tasks:

  1. Make almond flour
  2. Use said almond flour to bake carrot cake cupcakes (as per fiancé’s request)
  3. Make cream cheese frosting for cupcakes


Let’s start with the almond flour. As confessed in my previous post, I’m a carb counting baker which usually means I bake a bunch of stuff that I don’t really get to eat or enjoy. Enter Interwebs. In doing research for my previous post’s No Flour Banana-Apple Muffins, I came across “Almond Flour”. Now, before I go on I should divulge a little bit about my recent situation so that you don’t think I live under a rock and send smoke signals instead of text messages and that laundry day consists of me going down to the stream to beat our clothes against rocks.

Up until September 20th, I was working on getting my second MA in Applied Linguistics. Translation: for the past two and half years there has been little baking, joy or spare time in my life. Up until my dance with the No Flour Banana-Apple Muffin recipe, it had been over a year since I had last made an oven goodie and my recipes were pretty much all-purpose flour based. Fast forward to this past week where in I first encountered “Almond Flour”. I was intrigued to say the very least. Now, something else about me, I currently live in South Korea where my fiancé and I teach at a University. Translation: there’s no way I’ll be able to buy almond flour at the local grocery store.

So, that brings us to this morning, when I decided I would try my hand at making my own almond flour, using pointers by the Detoxinista.

R0011181

For my almond flour I used sliced almonds that I found at E-Mart Traders and our blender. As per the Detoxinista’s suggestion, I used the pulse function to make sure that I wouldn’t end up with too many clumps or almond butter! I also blended one cup at a time to have better control over the consistency of the flour.  I pulsed for about 20-30 seconds at a time and only had to do it a few times for each cupful of sliced almonds. The four cups of almonds yielded about 3 3/4 cups of almond flour which wasn’t as fine as regular flour but certainly bake-able. I also sifted through the flour with a fork before storing to get rid of any clumps.

Overall, I have to say I was 100% pleased with the results and am now scouring the Internet for almond flour recipes of which, fortunately for me, there are many.

Stay tuned for the next post for my Almond Flour Carrot Cake Cupcakes, based off of the recipe from Elana’s Pantry. Spoiler: They were awesome.

Love & Baking,

G

I’d Rather be Baking

Generally speaking, I would almost always rather be baking. As I’ve gotten older, it has become such a meditative, relaxing enterprise that I don’t know why it took me so long to figure it out. Darn you whiskey 20s!

I first discovered the joys of baking towards the tail end of both my 20s and a bad/doomed relationship whilst living in NYC. Domestic bliss it was not. But, when I would wake up early on the weekends and fill the apartment with the warm smell of buttermilk biscuits or a fresh apple pie, it almost gave the illusion of a home and of a life less hectic, and I have been hooked ever since.  Maybe that’s f****d up. But hey, baking blisses me out. And, there’s nothing I love more than to put on a little The Head and the Heart on the stereo and whip up something whose smell can both hollow out and fill up my heart at the same damned time.  Maybe I’m sentimental about a good banana-walnut muffin, but this is my blog and I can truth if I want to.

So, in honor of my love of baking, I thought I’d post a few recipes and photos of what’s been happening in my kitchen though I don’t claim to be exceptionally talented at either. Baking is a passion and the photos are a necessity for the blog.

Today’s experiment was inspired by the bunch of brown bananas in my fridge. Any home baker knows that brown, mushy bananas are like a prized cow at the 4H club. Those who don’t understand (i.e. bake) would turn their noses up at said bananas and presume them to be “rotten” and “no good”.  But, bakers see the world of expired fruits a bit differently. We don’t see a fruit past its prime but rather a plethora of possibilities in the forms of muffins, cookies and breads (which may explain some of our poorer life choices earlier on in life, but hey, so be it).

Anyhow, back to the point. Mushy bananas. Usually when I find myself confronted with mushy bananas I turn to my go-to Banana Walnut recipe, whip up a dozen or so of them, and have them for breakfast, hand them out to coworkers, etc. But, here’s the thing: though I love to bake, I rarely allow myself to fully enjoy any of my baked goods. Sure, I’ll have a taste to make sure it passes the yum-factor inspection, but rarely do I let myself partake in the fruits of my baking. Why? The ugliest five letter word in my vocabulary: carbs.

I am a carb counter and this blog post is starting to feel unsettlingly confessional. But, there it is. I’m baker who counts carbs. So, in light of this, with mushy bananas awaiting, I thought I would try to make a baked good I could eat without the carb guilt so that I could actually enjoy a muffin for once.

Here is the end result:

No Flour Banana-Apple Muffins (Adapted from various recipes online. My additions include the apples, the spices, the milk, and the vanilla.)

Ingredients:

  • 2 1/2 cup oats
  • 1/3 cup plain yogurt
  • 1/2 cup milk
  • 2 eggs
  • 1 1/2 tsp. baking powder
  • 1/2 tsp. baking soda
  • 2 old, mushy nanas
  • about a tsp of cinnamon, nutmeg, ground cloves (really to your taste/liking)
  • 1-2 tsps of vanilla (again, to your taste/liking)
  • a cup of cubed, spiced (I use the same spices from above) apples
  • brown sugar (opt’l and to taste)
  • Other add ins: walnuts, raisins, whatever makes you happy

Muffins pre-bake

Instructions:

  • Pre-heat oven to 400F/200C
  • Mash up bananas in a large bowl. Once they’re good and mushy, add in other ingredients and mix well.
  • Add more milk if necessary to get your desired consistency, but you don’t want the batter to be too wet.
  • Spoon mixture into a buttered muffin tin.
  • Bake for 15-20 mins. Check with a toothpick. If it comes out clean then they are done! If not, leave in oven for a few more minutes.
  • Once done, let cool in the pan for 5 minutes
  • Then, remove the muffins from the tin and place on a cooling rack and enjoy!R0011176


Some notes: These are great for breakfast and a healthy snack. I wouldn’t consider them a sweet treat. I had mine warmed up and with some butter and it was fantastic. Some jam or honey would also be good. Heck, maybe even some yogurt.

Also, my measurements aren’t always “exact”. But, this is a rough estimate which I hope is at least a good starting point. Anyhow, I hope you can use this recipe as is or adapt it to your liking.

Lots of love, and remember: Bakers do it Better.

xoxoxo

G